• Fashion is about what you wear. Style is about how you live your life. ~Ralph Lauren
Showing posts with label Crafts. Show all posts

Friday, July 22, 2011

Craft Cart

Today went by so quickly.  I went to see Harry Potter in 3D.  I saw it on the first night regular style but really wanted to check it out in 3D.  And since it's been so hot here I figured a cool theatre would be a good way to spend a few hours.  And after I got home from that I didn't do much else except lay in front of the air conditioner and did laundry.  I'm exciting, what can I say.

I did finish up a project that I started this week.  Last weekend I went to a few yard sales with my yard sale pals, Angie & Sabrina. We found a random treasure and after a little discussion Sabrina and I took home the below AV cart (there were two).  Now why would we need an AV cart?  No, it's not 1985 and we don't have overhead projectors to speak of.   But yes, we had a vision for it.

Doesn't this remind you of elementary school? 
 I spray painted mine a bright blue. 
 And turned it into a craft utility cart.  It's great because of the power outlet on the side.  Perfect for hot glue guns, irons, etc.  I have a craft closet but it's small and it's kind of annoying to always have to be digging out the basics for every time I want to be crafty.  And I hate messing up my tables and counters with messy projects. 

The bottom shelf has a big basket with things like an iron, a bow maker, paper cutter, rulers, etc.
The middle shelf has paint, ribbon and glue guns. 
The top houses a bucket of paint brushes and a little tote that has scissors, tape, glue, hole punch, etc.  All the essentials.  (I love this because it is portable so I can take this anywhere.  I even brought it to Jill's wedding in case we needed supplies.)
 And Sabrina and I found these great magnetic curtain rods to use for ribbon on the side.  I think I need a few more but I put my basic ribbons on these two. 
I'm still not sure where it will live but for now it's in the office (the "weird" room) in a corner.  I have a thing about having stuff like this visible but I don't think it's that much of an eye sore.  I really like that it's on wheels so I can move it around. 

I think it's a pretty good use of an old AV cart.  And it was only $8.  You gotta love a bargain like that.  And please go check out Sabrina's version.  She did a great job on hers and since she organized hers first, you'll see some of mine looks amazingly similar to hers.  :)  You know what they say about imitation...

What do you think?

And Happy Birthday to one of my favorite girls, Cristina!  xoxo

Wednesday, July 13, 2011

All Keyed Up

I took the last week of June off from work and did a lot of projects around the house.  I think I was feeling creative.  OR I am sick of my yard sale purchases sitting waiting to be done.  Either way, I got some stuff done.  I think my creativity is gone this week though.  I'm not working my normal hours so I have a lot of free time, but so far this week I've been laying on my couch feeling down.  Blah.  I need the creativity back....

Anyway, this project I was really excited about.  I have always wanted to do something with skeleton keys.  So I picked up three at my favorite "junk" store.  They were 2.50 each.  Which is fine but my Dad told me he has a box of them.  Damn!  (Dad, I'll still gladly accept a few for other projects)

The keys are sitting on my back porch (yes, the steps are weathered, but they look kind of cool with the keys)
I got a wooden frame for $1.25.  I painted it black and scuffed it up a bit. 
 Then I used burlap from a ripped sack that we used for the Greek Olympics.  (Resourceful, right?) I cut a piece and glue it on to a piece of cardboard to fit the frame.
 After the burlap dried, I glued the three keys directly on the burlap. 
I love how it turned out!  It's exactly how I envisioned it.  It's now hanging in my living room. 
And for the record, I need new lamps.  Like yesterday. 

What do you think of the key project?  It's totally pottery barn, right? 

I kid. I kid.

Wednesday, June 1, 2011

Crafty-ness

I was feeling really productive and crafty this weekend.  I had found this blog post here and wanted to make one for myself.  I thought it was a great idea. I went out to some yard sales and junk store to find the supplies:

Candlesticks that were painted a flat black. 
3 old cake pans (small, medium and large)
Used some e-600 glue to attach it all.
Turn the second candlestick opposite of the first one. 
And boom.  A three tiered stand.  I'm not sure what I'm going to use it for but it's going to be great.
A very easy project.  Thanks to the Crafting Chicks for giving me the inspiration. 

Saturday, May 28, 2011

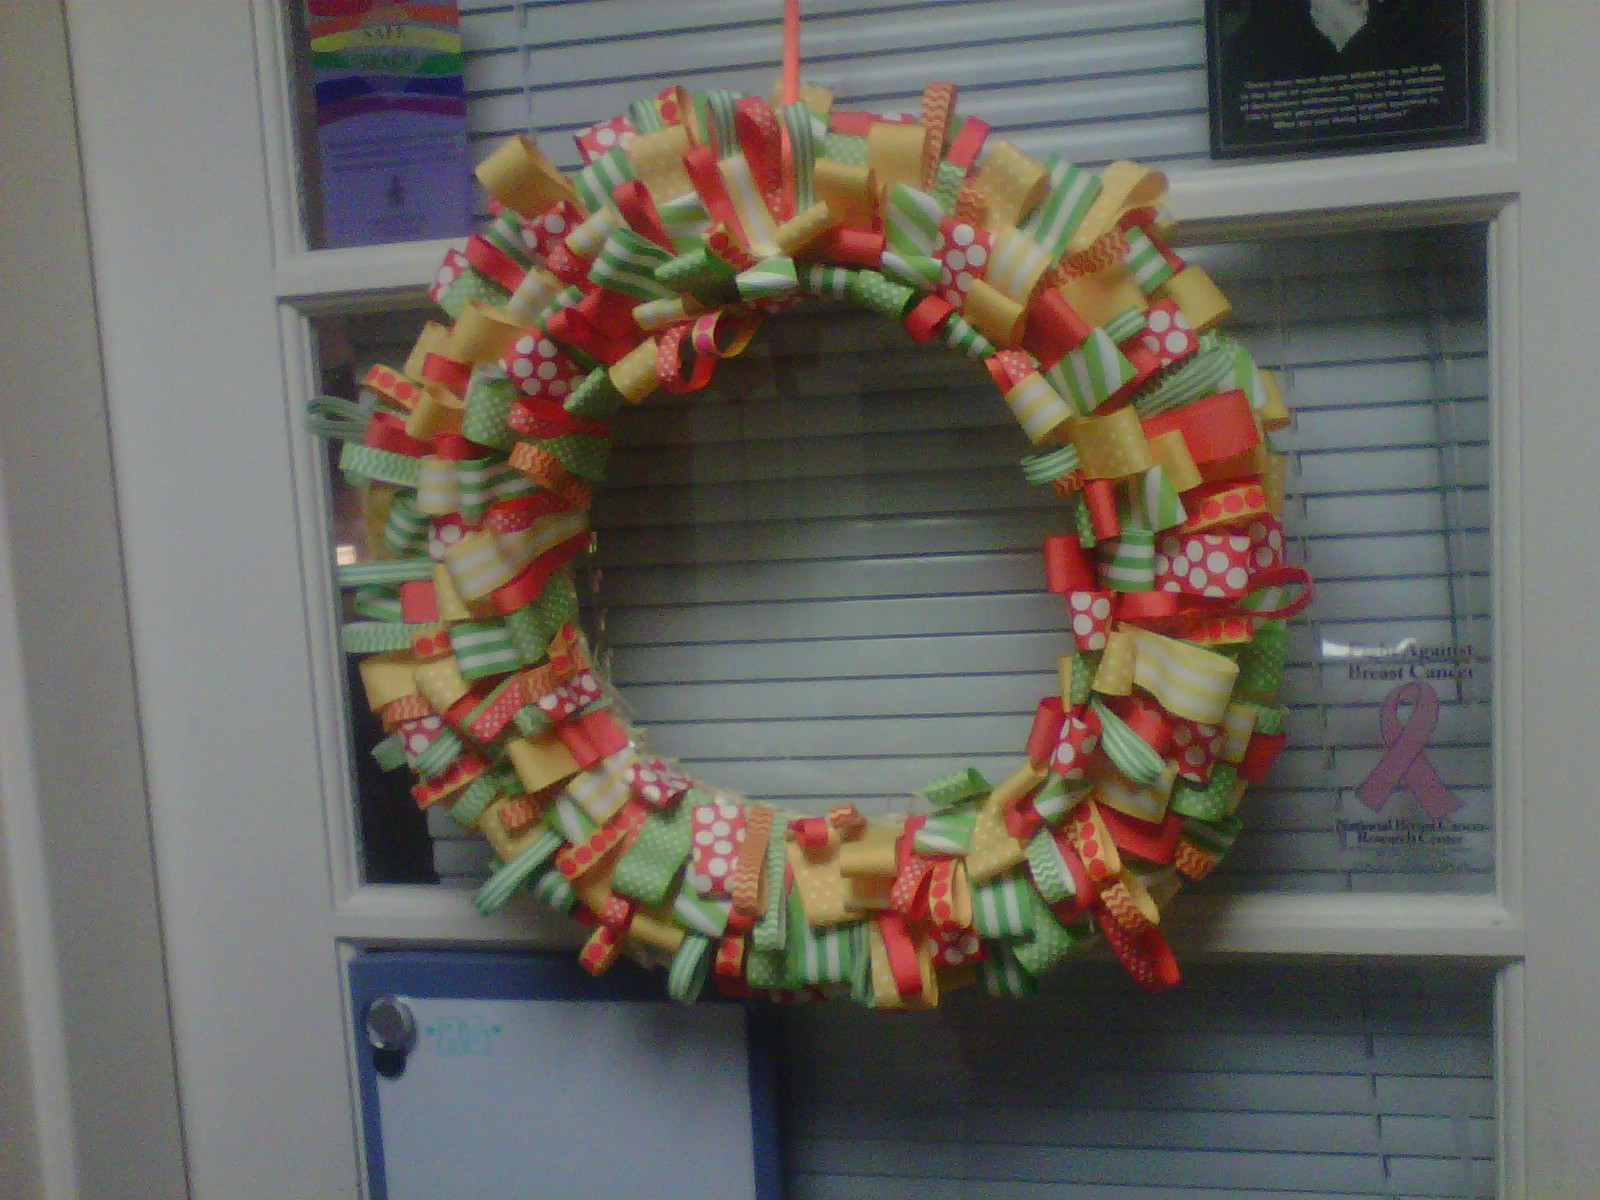
Wribbon Wreath

I know I spelled ribbon wrong on the title.  I thought I was being clever.  Ha.  Whatever, I'm tired.  Today was graduation so I had to stand for 3 hours in regalia.  I need a nap, but I felt like to finally posting pictures of this project.  It started a few months ago.  A few friends ordered ribbon from ebay or etsy or something (I don't  know, Angie was in charge of that) and we were going to get together and do these wreaths together.  I'm pretty sure there was still snow on the ground when we started this. 

Anyway, the ribbon came in and months we spent one night cutting all the ribbon and made loops secured by a dab of hot glue.  That took about an hour or so.  I'm pretty sure the wine I drank whilst doing this project kept me entertained.  Fast forward to a few weeks ago and we finally got around to finishing. 

Basically, we took the aforementioned ribbon loops and glued them on a wreath form randomly.  Here it is as I was getting started.  Wine was in order for this part too.  That definitely helped with the burns I received from the hot glue gun. 
This is the finished product.  It now lives on my office door.  It's definitely a bright and fun addition for the summer. 
I should make another for the fall.  Judging by how long this one took to complete, I better get started now...

After I take a nap.

Happy Saturday! 

Wednesday, April 13, 2011

Treats & Tags

This morning I got up early to make some dog treats for Jill's dog, Cedar's 5th birthday party.  Yes, I did say a doggie party.  It was fun...but more on that later.

The treats are wildly popular with all dogs.  It's kind of a project to do but apparently they are delicious to doggies.  I'm going to give you the recipe because if you have a dog in your life, you should make these.  They will love them.
3 cups whole wheat flour
1 cup non fat dry milk
3T (1 pkg.) dry chicken or turkey gravy mix
3T brown sugar
1 egg
2/3 cup vegetable oil
1 cup warm water
Mix all together (the dough is VERY sticky so I let it sit before I roll it out)
Roll
Cut with Cookie Cutter (I use a Bone shape)
Bake until golden brown and firm 350 degree oven

After the baking was complete.  This recipe makes about 60 treats.
 I bagged them up so that the other  dogs could get a treat at the party. 
And I used these tags I had made a few years ago.  I love these grubby tags and wasn't blogging at the time I made them (one of Angie and my craft nights). So I figured I'd show how to do this too.  The day started out very productive as you can tell.  It went downhill as soon as I left the house, however.

Start out with some shipping tags from any office supply store.
2 cups hot water
1/4 cup instant coffee (dry)
1/4 instant tea
3 tablespoon imitation vanilla
Mix well in a bowl. Place tags in the bowl careful that they don't stick together. Let soak for 15 minutes
Lay on a cookie sheet and sprinkle lightly with cinamon. Preheat oven to 200 degrees. Bake the tags for 15 minutes or until dry
I took the basket of treats to Cedar's birthday party.  Jill is a live on staff member at the college so she invited her buildings and it was very impressive to see how many students came to this event.  And there were several of our staff friends there too.  Not to mention some other puppies.  Our campus works with the guiding eyes program so there are lots of puppies on campus every year.  It's nice to see them walking around campus and watching them play in the residence halls.  And Cedar makes friends with all of them.  He's a popular dog around here.  So it was only to be expected that his birthday celebration would be too.  

He's looking at the candle while people sang to him.
 And he loved his treats too!
Happy Birthday Cedar!! 

I love that I live in a place that a dog's birthday party is an event. 

Exactly how it should be...